

The Gift of South Dakota
Subscriptions to South Dakota Magazine make great gifts!
Subscribe today — 1 year (6 issues) is just $29!
Pine Needle Basketry
 |
| Trisha Blair's baskets continue a centuries-old practice that traces to the Anasazis of the Southwest. |
Trisha Blair believes that anyone who appreciates the concept of making something from nothing — and who has a persistent nature — may want to try creating coil baskets from ponderosa pine needles.
Despite droughts, forest fires, pine beetle infestations and civilization, the ponderosa pine remains the dominant tree in the Black Hills. The mountain range’s very name was inspired centuries ago by its peaks and valleys forested with darkish green pine needles. The Lakota called it Paha Sapa, which translates to “dark hills.”
A typical needle grows to 6 inches over three or four years before shedding. Sometimes the mat of needles on the forest floor becomes so thick that it represents a fire hazard in dry conditions. Property owners often rake up the needles, both for aesthetics and to eliminate them as tinder. Some “green thumbers” use them as mulch in their mountain gardens.
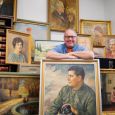
Blair has found a higher use. Like Native Americans of centuries past, she uses the needles to create beautiful baskets — not by weaving but by coiling. The former English teacher, an accomplished oil and acrylics painter, says her art career began as a child. “We had an outdoor toilet and the four rough walls were conducive to drawing and painting, which I did. I covered them with pictures of horses and naked ladies. It seems that I liked Lady Godiva with long, flowing hair, and that’s where my art started.”
In the 1970s, Blair was studying in New Hampshire and exploring the East Coast when she toured the Smithsonian Museum in Washington, D.C. A friend was working there, so she got to enter the backrooms and see collections not open to the public, including blankets and baskets made by the Anasazis hundreds of years ago.
She held the baskets, studied the coils and noticed both their perfection and the imperfections. “I remember thinking even then that it’s something I felt I could do.”
Upon returning to South Dakota, Blair worked as a teacher and began painting pictures. Through the years, she developed a problem: “I couldn’t bring myself to sell the paintings. They are too much a part of me. I have a treasure room full of them and every relative has them hanging on their walls.”
When she embarked on basket making, a friend wondered if the baskets would end up in the treasure room with the paintings. “You know what’s going to happen,” warned the friend. “When you die, your son is going to box them all up and sell them for a quarter.”
Thanks to her friend’s honesty, Blair pledged to enter her new art phase with less sentimentality. As soon as she was satisfied with the quality of her baskets, she offered them for sale at a Deadwood art gallery.
Several years ago, she joined the Chautauqua Artisans Market, a group of artists who share a gallery on River Street in Hot Springs. Her baskets are also exhibited at Art Expressions in Custer and ArtForms in Hill City. She has sold them to appreciative buyers throughout the United States, and as far away as Russia and the Middle East.
North American basket making likely began with the Anasazi, a people known as “the ancient ones” who lived in cliff dwellings and stone pueblos in today’s Utah and New Mexico. The Anasazi mysteriously departed the area about 700 years ago, but many of their crafts and traditions were embraced by other tribes.
Blair is entirely self-taught; her encounter with the Anasazi baskets at the Smithsonian was her only tutorial. “That’s where I was inspired, though I never thought then that I would be doing it today.
“Their baskets had no knots, which is a challenge,” she says. “I also noticed that they made tiny mistakes,” which freed her from the burden of trying to perfect each stitch. “Another thing, you couldn’t tell where the coiling ended so that’s always been a goal of mine.”
Blair says coil basket making is slow and tedious. “I can spend a couple of weeks on a basket,” she says. “My son says I make 5 cents an hour.” However, like the “ancient ones,” she doesn’t do it for money. There’s satisfaction in making something beautiful from nature’s bounty. She has developed her own techniques and tricks. She even copyrighted a unique method of using a tooled leather base.
Blair believes almost anyone can learn, though it’s akin to hitting a baseball or riding a bike: you could read about it forever, but you need to see and do.
Fortunately, numerous YouTube videos and tutorials can be found online for visual learning — and Blair generously offered to explain the process as it works for her.
Needle Selection
Never take healthy green needles from a branch unless the branch is already broken and dying, and, conversely, try not to take needles off the forest floor because they may have bark lice or fungi, especially if they appear black.
“The most beautiful needles come from trees that have been stressed out by a fire or from the bug infestation,” she says. “When there is a fire that’s the first place I look.”
It’s easiest to work with longer needles; hopefully you can find some that are 4 to 5 inches long. She says pines in the Northern Hills generally have longer needles than those in the Southern Hills. If you harvest green needles, it takes a year to dry them and even then they don’t have the beauty of a needle that dries on the branch.
Blair tried a shortcut that nearly ended in disaster. “My son found some wonderful green needles, and I thought I would try to dry them in the oven.” She quickly learned why pine needles are such a fire threat. “They caught fire and I could have burned the house down,” she says. “Don’t do what I did.”
Blair washes the needles with soap and water, boils them, lays them on newspapers to dry and then puts them away until she is ready to coil. She also decaps the needles while they are wet, though she notes that some basket makers leave the caps for a more rustic look. Decapping is a laborious job, so she says you can expect friends and relatives to avoid you at that stage.
Gathering the Tools
Basket making requires pine needles, waxed thread (Native Americans used sinew, and some basket makers still prefer it), a base material such as wood or plastic, a sharp scissors, a sharp sewing needle with a large eye and a gauge to hold the coil of needles as you sew them together.
The gauge also maintains a uniformity in the coil size as you circle the basket. Some people use a 2-inch piece of 3/8-inch copper or plastic tubing; Blair simply uses a short piece of a large soda straw (again, about 3/4 of an inch wide and 2 inches long).
The base can be anything — round, square or rectangle. Nature-loving artists use a section of a black walnut shell; the natural holes in the cavity provide a way to sew it to the first coil of needles.
A round bit of plastic, wood or any other material is suitable. Drill or punch holes around the edge so it can be sewed to a coil. A 4-inch coil of needles can also serve as the base, and that’s the method described below by Blair.
Begin to Coil
Blair says the needles must be wet and flexible, so wash them and pull off the caps at the end, but don’t separate them if they don’t separate themselves (often there will be three needles to a nodule or cap).
Put about 3 feet of string on the sewing needle. Fill the tube or straw with pine needles (it will probably hold 4-6). Start wrapping the thread tightly around the needles for three inches or so, moving the tube as you go.
After you have 3 to 4 inches sewn, force the coil into a circle, bending the needles back on themselves; secure the circle by pushing the needle and thread through the circle.
Making the Bottom
Reload the tube and continue with your first coil. Each time you wrap thread around the coil, you also stitch it through the previous coil. For aesthetics, find a method to keep the threading even from coil to coil; Blair uses her thumb to measure the distance. Keep adding needles to the tube as you go, always keeping it full so the coils are an equal thickness.
Whenever you get down to about 4 or 5 inches of thread, filter the thread onto another 3-foot string. If you find it too difficult to weave one length of thread into another, you could tie a knot and then hide the knot between the coils, but remember that the Anasazi never used knots.
Once the bottom is as wide as you wish (and why not begin with a small basket?), start to slant the needle upwards so the basket will naturally go up.
Creating the Walls
You can choose to make a straight wall around the bottom or taper it by gradually sloping each coil outward. As you spiral out, the stitches should get farther apart; again, find a method to space them properly. Keep the coils tight. Once you’ve reached the desired height, stop adding needles to the tube and allow the needles to taper down. Trim the needles with a scissors if they don’t taper properly. In the Anasazi baskets, it is hard to see where the coil ends.
Don’t hurry. Blair says even experienced basket makers can spend an hour per coil.
Finishing the Basket
Blair says “the ancients” used pitch bark to seal and preserve their baskets, but today it’s probably easier to use beeswax or shellac. “I thought I would use pine sap. I burned a tank of gas, driving through the forest. Hours later I had this little wad of pitch, mostly from bark beetle trees. It was just about enough to do an eighth of a basket.” She recommends varnish, beeswax or nothing at all.
Start with a small project, perhaps even a coaster, to avoid frustration. Blair suggests that beginners do small baskets of perhaps 3-4 inches in diameter. Explore opportunities to learn online or in person at a class or workshop. Even inspecting a coil basket in your hands can inspire and educate.
Finally, Blair suggests from experience, don’t hide your pine needle crafts under a bushel basket or in a treasure room; show them off, offer them at a gallery or use them in your home.
Editor’s Note: This story is revised from the May/June 2021 issue of South Dakota Magazine. To order a copy or to subscribe, call (800) 456-5117.


$29 for 1 Year |
 |
Comments
I love to buy soms but I live in belgium and getting something from Amerika over the Belgium border is VERY expencive ! Not normal anymore...
I had a Lakota grandmother beating me a barrette for my hair... 80€ to bring into Belgium ! Posting charge not included ...
Anyway... Nice job !
Greetings from Belgium, Debby Dekeersgieter