Posted on Leave a comment

Hunting Charles Mix Plums

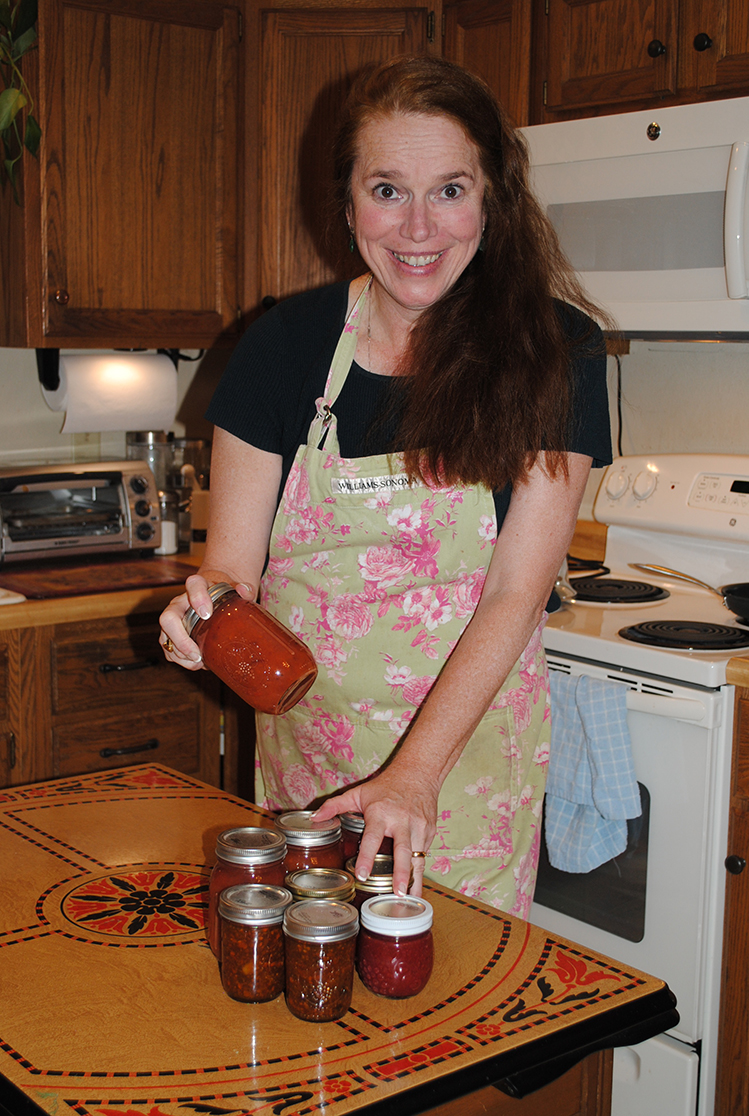
Janine Kern’s family plum-making heritage is a sweet respite from her professional service on the South Dakota Supreme Court. She became the 49th justice in state history in November 2014.

As a 16-year-old living in Lake Andes I was only mildly interested in the conversations between my grandmother and my great aunts about the status of ripening plums on the river bottom in late August. There was much discussion about sending out my father to look for plum patches and whether various relatives should help in the hunt. In my teenage view this level of excitement wasn’t warranted for plum jam or any canning project for that matter.

Many years later I married a man named Greg and one of his many interests was canning. Once he traced a recipe for a jar of pickles he purchased at a roadside stand to the cook who was residing in a nursing home in western South Dakota. She was delighted to share the recipe.

Greg’s zest for canning turned my thoughts back to the beautiful plums available in shelterbelts, ditches, ravines and on the Missouri River bottom in Charles Mix County. So just as my grandmother had done 40 years earlier, I asked my father, Paul Kern, an avid outdoorsman, to scout for plum patches for future harvests.

Several years later talk turned to action, and we harvested a number of plum bushes in a shelterbelt on my parents’ land. We also scoured the ditches and river bottom looking for ripened plums while being mindful of the sharp branches on the bushes and keeping an eye out for rattlesnakes. I know several industrious souls who have no qualms about picking and canning a pickup-full, but we settled for two 5-gallon pails of the biggest, juiciest plums we could find.

Over the years I discovered that conditions must be perfect for a plentiful plum harvest — namely a gentle spring without hard frosts and rain throughout the summer. These conditions are hard to come by in southeastern South Dakota, which causes me to ration plum jam throughout the year, never knowing if there will be another crop of plums. Fortunately, my father noted, it is easier to find plums now than it was when he was growing up because fewer people are harvesting them.

I took the two 5-gallon buckets of plums back to our home in Rapid City to prepare the fruit. Although there are other methods, such as boiling the whole plum and removing the pits after, I enjoy pitting the plums one at a time with a paring knife then putting them on to boil. We wear cloth garden gloves to protect our hands and arms from the splattering plum sauce. The aroma of the boiling plums is almost intoxicating.

Depending on individual preferences one can make jelly, syrup or jam with the desired consistency. We prefer jam over jelly because we like to see pieces of the plum when spread on hot buttered toast on a cold winter morning.

I am a novice canner and greatly admire those who fill their pantries with the bounty of their gardens. The colorful glass jars provide not only nutrition but also the fond memory of summer. Canning recipes passed down through generations are part of our heritage as South Dakotans. Hopefully the younger generations can be drawn into the wonderful world of canning without a 30-year delay like my own.


Janine’s Family Jam

Pick large beautiful plums if you can find them. Pit one at a time. Refrigerate fruit if it won’t be immediately canned. Sprinkle stored fruit with lemon juice and stir. Can last three days in the refrigerator until you are ready to tackle the project.

When ready to can use a food processor to chop plums to desired consistency. Place 13 cups of plums in a large canning pot. Mix 1/2 cup sugar and 2 boxes of low sugar pectin in a separate bowl and then add to plums. Bring to a full boil. Add 8 1/2 cups sugar a few cups at a time while stirring. Return to a full rolling boil for exactly 1 minute. Remove plum mixture from heat.

In a large processing pot have your jars preheating. In a small saucepan simmer jar lids and rings in water. Fill jars to 1/8 inch from top with plum mixture. Return to processing pot and boil 10 minutes. Remove the jam and place on the counter to cool. Listen to the jar lids pop, assuring you have a good seal. Serves as a powerful pick me up on a cold winter day. Makes 8 pints.

Editor’s Note: This story is revised from the September/October 2015 issue of South Dakota Magazine. To order a copy or to subscribe, call (800) 456-5117.

Posted on Leave a comment

Summer Swirl

Recently, South Dakota Magazine conducted a very scientific and exacting Facebook poll. Zesto and B&G Milky Way were pitted against each other for favorite South Dakota summer ice cream stand. Write-in votes were welcomed for other options across the state.

Officially, 647 votes were cast with Zesto coming away the clear choice of Facebook voters. Perhaps this is due to Zesto’s expanded locations across the state. B&G is limited to just the Sioux Falls area. Both are excellent destinations for cool, summer ice cream treats. Personally, I almost always get the sherbet of the day when visiting Zesto in Pierre and love a strawberry twist cone from B&G Milky Way.

The 25 other write-in locations shouldn’t be ignored. I am keeping them all in mind for my jaunts back and forth across the state. There was a lot of love for Twist Cone in Aberdeen and Armadillos in Rapid City. Leone’s Creamery in Spearfish had a few mentions, and I can’t argue with the one vote for a vanilla cone at the Winner Drive-In Movie Theater.

I am also intrigued by the comment from Jim Schmidt recommending blending vanilla ice cream, mini Tootsie Rolls and a little milk at home. I vote that he should invite us over next time he fires up his blender.

In the meantime, I will happily whip up some Cherry Swirl Frozen Yogurt at home. A few years ago, we invested in the KitchenAid mixer ice cream maker attachment, and we love, love, love to make homemade ice cream and frozen yogurt all summer long. Adding fresh, seasonal fruits makes it even better. While strawberry is hard to beat, I can’t resist picking up fresh cherries when they come in season in July. If there are any that I don’t just pop into my mouth and devour as a snack, they add a perfect tartness to smooth and creamy frozen yogurt. Since I am not near B&G’s Milky Way or Zesto, this will get my vote, for now.


Cherry Swirl Frozen Yogurt

(adapted from Cooking Light)

1 1/2 cups fresh sweet cherries, pitted and coarsely chopped

1 tablespoon brown sugar

2 teaspoons fresh lemon juice

3 cups plain whole-milk yogurt (I have also used vanilla whole-milk Greek yogurt or homemade whole-milk yogurt.)

1/2 cup heavy cream

1/3 cup sugar

2 tablespoons light corn syrup (this really does wonders to help the creamy texture of the finished product)

1 teaspoon vanilla bean paste

Bring cherries and brown sugar to a boil; cook until cherries begin to soften. Reduce heat to low and cook until syrupy, about 10 minutes. Stir in lemon juice. Remove from heat and cool. Refrigerate at least an hour, until chilled through.

Place a loaf pan in the freezer to chill at least 30 minutes. Whisk yogurt, cream, sugar, corn syrup and vanilla bean paste until smooth. Chill 1 hour.

Pour yogurt mixture into the freezer can of an ice cream freezer; freeze according to manufacturer’s instructions. Spread half of frozen yogurt into the chilled loaf pan. Dollop half of the cherry mixture over the top; swirl into frozen yogurt with a knife. Repeat with remaining frozen yogurt and cherry mixture. Press a piece of parchment paper directly on top of frozen yogurt and wrap entire loaf pan tightly in plastic wrap. Freeze 4 hours, or until firm. (Serves 8)

Posted on Leave a comment

These Eggs Are Peachy

Fried egg? Think again.

What does someone who is obsessed with food, recipes and fun do on April Fools’ Day? Of course, they pull a food prank.

Get up before your spouse, fry some bacon, toast your favorite bread and brew a pot of coffee. Then, get ready for the prank. Create a special “egg” on a breakfast plate and have it waiting when the sleepy fool meanders down the stairs. Having a spouse that doesn’t fully wake up until the second cup of coffee does help to pull off the surprise. Enjoy the laughs and have a great day!


Peachy Eggs for April Fools’ Day

1/3 -1/2 cup vanilla yogurt

Ω peach (canned halves in light syrup work well)

Spread yogurt into circle on plate, using the back of a spoon. Place peach half, flat side down, in the center of the yogurt.

Fran Hill has been blogging about food at On My Plate since October of 2006. She, her husband and their three dogs ranch near Colome.

Posted on Leave a comment

Better Living Through Berries

“Berries make better bodies,” according to Jeff & Jolene Stewart. Since 2008, they’ve been growing the aronia berry, a tart, dark purple superfruit loaded with antioxidants, on their ranch near Wagner.

Their healthy journey began in the bermed flower beds of their home in Idaho, where Jeff was employed with the Department of Agriculture.”Jeff noticed that on the top there were all these bushes that had these dark, deep purple berries,” Jolene said. A tag on one bush identified the fruits.”As we moved to South Dakota and Jeff worked more with specialty crops, we got interested in them. The more we learned about the health benefits, the more we decided that this was something we wanted to raise,” Jolene said.

Aronia berries are also called chokeberries — a name that can generate some confusion. Though they’re similar to chokecherries in taste, the two plants are only distantly related within the Rosaceae (rose) family. The scientific name for chokeberries is Aronia melanocarpa; the chokecherry is Prunus virginiana. Aronia leaves and seeds lack chokecherries’ cyanide content. For laypeople, it’s easy to tell the difference if you check the berries’ insides. Chokecherries have large pits in their centers, but aronia berries contain tiny seeds.

The Stewarts grow three varieties of pesticide and herbicide-free aronia berries at their ranch: Viking, McKenzie and Galicjanka, a new Polish cultivar, as well as Boer/Spanish cross goats. Harvest time usually falls over a three-week period in late August and early September. At first, they tried to harvest by hand, but with over 11 acres of berry bushes, that proved impractical. This year, a new berry harvester should make the task easier.

The Stewarts’ aronia berries are available at the farmers market in Wagner, Co-Op Natural Foods in Sioux Falls, and at the Stewarts’ home. It only takes 15 berries a day to see aronia’s health benefits. Though the astringent, mouth-puckering flavor can be off-putting at first, Jolene recommends giving them a try.”Experiment and you can find a way you like it. My favorite way is in smoothies. Jeff’s favorite is stir fry.” They also go well in salads, with yogurt or on cereal.”I put them in things that wouldn’t be considered quite as healthy,” Jolene says. She’s made aronia wine, brownies, apple crisp, jelly, cream puffs, French toast, cookies and more.”The one thing you have to get used to is a little purple color in things,” she says.

The health benefits of aronia berries make this experimentation worthwhile.”Aronia berries are packed with antioxidants, and studies indicated they promote colon health,” Jolene says. The Stewarts have noticed a drop in in their cholesterol levels since going on the berry. Others experience more dramatic results.”We have one friend who took an ounce of aronia juice every day for 2 or 3 months,” Jolene says.”When he went to see the doctor, his blood pressure was lower, PSA was down, cholesterol was down and he lost weight.” Those are powerful results from one little berry.

If you’d like to visit Stewart’s Aronia Acres, call 605-384-4443 or visit their Facebook page.


Jolene’s Aronia Smoothie

From Dakota Rural Action’s South Dakota Local Foods Directory, 2013-2014

Jolene encourages smoothie creativity. When her two sons were growing up, the daily family breakfast game was”What’s in the smoothie today?” She’s tried dates, pecans, walnut milk, zucchini and carrots with this basic recipe, with good results.

1 cup aronia berries
1 banana
1 apple, chopped
1/2 cup vanilla yogurt
1 cup peaches (canned or fresh)
1/2 cup juice (apple, peach, orange, etc.)
3/4 cup water with ice cubes

Place ingredients into a blender and blend until smooth. Adjust liquid/ice amounts to your personal preference and enjoy.

Posted on Leave a comment

Let Them Eat Cheesecake

Yesterday, January 23, was National Pie Day. According to the American Pie Council…oh my word, yes, there is such a thing…it was a day to raise awareness, enjoyment and consumption of pies. Events ranged from pie festivals, pie bake-offs, pie feeds, and of course, free pie. If pie is your thing, it seems January 23rd was the day to party.

If you aren’t all pie-faced over pie, hang in there. It wasn’t until I became involved in the food blogging world that I learned there is a food event or holiday for almost every day of the year. Earlier in January, there was National Fig Newton Day and a Peking Duck Day. The entire month is devoted to Bread Machine Baking Month and National Soup Month, among others.

It seems some people really need an excuse to celebrate, and I say, go for it. Why not? Why not enjoy and celebrate food? Why not have something fun and a bit silly in our otherwise serious and often stressful world? Why not let them eat pie? Or fig newtons? Or cake?

National Cheesecake Day isn’t officially celebrated until July 30, but if I were you, I wouldn’t wait that long to make Brownie Cherry Cheesecake. It is a sort of celebration all on its own. A dense, chewy, chocolaty brownie is layered with baked creamy, rich cheesecake and topped with classic sweet and tart cherries. It is a party in your mouth no matter what day it is.


Brownie Cherry Cheesecake

1 brownie mix (for 8×8 inch pan)
1/3 cup oil
1/3 cup water
1 egg
(or whatever ingredients are stated on the package)

Cheesecake Layer:
2 eggs
2 cans sweetened condensed milk
2 packages cream cheese, softened
2 teaspoons vanilla

2 cans cherry pie filling

Prepare brownie mix as directed on package. Spread batter in a 10″ or 12″ round springform pan that has been sprayed with non-stick cooking spray. Bake at 350 degrees for 25 minutes. Meanwhile, beat eggs, sweetened condensed milk, cream cheese and vanilla until creamy and smooth. When brownie layer is baked, immediately pour cheesecake filling on top. Spread carefully to edges of brownie. Bake 30-40 minutes more, or until cheesecake is set and firm. Cool for 2 hours. Top with cherry pie filling. Flavor is best when served at room temperature, but cheescake should be stored in the refrigerator. Serves 12.


Fran Hill has been blogging about food at On My Plate since October of 2006. She, her husband and their dog, Ace, reside near Colome.


Posted on Leave a comment

Watermelon Granitas


It’s hard to write about food when you’ve lost your appetite. With all the hot weather lately, who wants to cook, anyway? Not this gal. Lucky for us we don’t have to turn on the oven to enjoy the cool fruits and vegetables of summer: sweet berries, cool cucumbers, crisp salads, and best of all, watermelon.

But watermelons are tricky fruits. Who among us has not experienced the letdown of thumping a pile of grocery store melons, taking one home, cracking it open and discovering a pale, anemic interior? To learn how to pick a good ‘un, I revisited tips gleaned from South Dakota Magazine‘s 1997 visit to the melon-growing experts in Forestburg, South Dakota’s watermelon capital. Here’s what they said:

  • Thumping is a layman’s test of whether the melon is ripe. A hollow sound means “get the knife.”
  • “Once you’ve raised them for a while, you can tell by the color,” said Charlotte Nelson of Nelson’s Melon Stand.
  • “I look for the little curl beside the stem. If it is dry the melon is ripe,” confided Skip Larson.
  • The late Levo Larson, Forestburg’s Watermelon King, told us ripe melons have a chalky look. A melon that needs more time on the vine will have a shiny appearance.

The best way to ensure you’ll be enjoying a ripe, sweet melon is to buy from a grower. “It hurts our pride to pick a green watermelon,” Levo told us. “We guarantee ours to be ripe and we guarantee them to have Vitamin P if you eat enough.” If a cool slice of melon doesn’t seem cold enough on our hottest days, try a watermelon granita. It doesn’t require cooking, and it gives you an excuse to periodically stick your head in a nice cold freezer.


Watermelon Granita

Adapted from Bon Appetit


4 cups cubed seedless watermelon
1/2 cup sugar or to taste
1 tablespoon lime or lemon juice

PurÈe all ingredients in a blender until smooth. Pour into a 9x9x2″ baking pan. Freeze mixture for 1 hour. Stir, mashing any frozen parts with the back of a fork. Cover and freeze mixture until firm, about 2 hours. Using a fork, scrape granita vigorously to form icy flakes. Serve.

Posted on Leave a comment

Meet Our New Staffer

Today’s an exciting day at the office. We began the day with some wheat bread and homemade raspberry jam, brought by our newest staffer, Laura Johnson. Laura is our assistant marketing director. She will be working with Heidi Marsh to be sure fresh, entertaining material is always available to you on our website.

Gardening and cooking are some of Laura’s favorite hobbies, so she might start contributing some recipes and food articles. Laura wrote a couple of paragraphs to introduce herself to our web readers. We asked her to share the raspberry jam recipe with you, too.

Our new staffer, Laura Johnson.

I started out life on a farm north of Mission Hill. I can remember hot summer days spent out in the bean field spraying weeds with my dad and brothers. Every now and then, Dad would suggest we quit early for the day and head over to Ponds of Fun to relax. By Ponds of Fun, he meant the scummy, snapping turtle-infested pond in Mission Hill. It had its hazards, but the water was cool and it beat working.

After 13 years spent in exile in Minnesota, I moved back to South Dakota in 2006. One of the things that brought me back home was the desire to spend time with aging grandparents, but another draw was the ability to see the sky again. When you grow up loving farmland and prairie, being hemmed in on all sides by trees and buildings can be rather oppressive.

Last year, I was allowed access to a friend’s abandoned raspberry patch. I wasn’t even sure I liked raspberries, but was lured in by the idea of free food and the ability to indulge in my passion for pulling weeds. Once I had experienced the thrill of seeking out the little red berries while fighting off insects, thorny raspberry canes, and giant weeds, I was hooked. Once my friends and family tried the homemade raspberry jam that resulted from my labor, they were hooked too. Be careful who you choose to give a jar to – they will pester you for more.

Raspberry jam glows atop a slice of peanut butter toast.

Red Raspberry Preserves

4 cups raspberries
3 cups sugar
1/4 cup lemon juice

Makes about 3 cups.

Sort fresh raspberries, discarding any that are soft, moldy, or otherwise dubious looking. Rinse and drain them well.

Stir the raspberries, sugar, and the lemon juice together in a bowl, using a rubber spatula. Let the mixture stand, stirring gently once or twice, until the sugar has dissolved, about 2 hours.

Scrape the mixture into a stainless steel or other nonreactive large skillet or sautÈ pan. Bring it to a boil, stirring constantly with a straight-ended wooden or nylon spatula, and boil it rapidly, stirring often, until it passes the jelly test; this will take from 3 to 5 minutes, depending on the juiciness of the berries. Remove from the heat.

Skim off any foam and ladle the hot preserves into hot, clean half-pint canning jars, leaving º inch of headspace. Seal the jars with new two-piece canning lids according to manufacturer’s directions and process for 10 minutes in a boiling-water bath. Cool, label and store the jars. The preserves will keep for at least a year in a cool cupboard.

If the jelling doesn’t work out, do not fret. Even if it does slide off your toast, the cooked berry-sugar mixture will still make a fine sauce for ice cream, waffles, or anything else that would benefit from a sweet, fruity topping.

From”The Good Stuff Cookbook” by Helen Witty

Posted on Leave a comment

Bernie’s Favorite Dessert

The Hunhoffs have been gathering for a Fourth of July picnic for over 20 years. Culinary-wise, it’s the highlight of the summer. Two long picnic tables are full of delicious summer salads and desserts. The main course is hotdogs from Steiner’s Locker in Yankton (which is also located just a couple of doors down from our magazine office and my house — so I like to say I live in the meatpacking district).

Some new foods crop up each summer at the picnic. This year, for example, my cousin Matt’s girlfriend, Kelsey, brought homemade candy corn in red, white and blue instead of orange, yellow and white. Kelsey actually has her own blog, Kelso’s Candy Dish, where she posts about her candy-making experiments.

And each year at the picnic I’ve also come to expect some old favorites, including Emma Lou’s rhubarb dessert. There would be a lot of disappointed people at the picnic if she missed bringing it one year. Here’s the official picnic invite we got this year from my dad:

Subject: Fourth of July Picnic

Hi Everybody,

Remember, we’re meeting at noon at the usual picnic shelter in Gavins Point for our annual Fourth of July Hunhoff picnic. Mark says we should just do what we always do, which means I will eat five hot dogs and try to hide Lou’s rhubarb dessert from you. See you on Monday at the lake.

He did try to hide it, but we were watching. Everybody had a chance to enjoy the dessert, and now you can do the same because Lou gave us the recipe.

Rhubarb Torte

2 cups flour
1 cup butter (Lou uses Blue Bonnet ole)
4 tablespoons sugar
1/4 teaspoon salt
Crumble together and pat into 9×13 cake pan. Bake in 325 degree oven for 25 to 30 minutes or until it starts to brown.

Filling:
6 egg yolks (save whites for meringue)
2 cups sugar
2/3 cup sour cream (Lou has always made with carnation milk)
4 tablespoons flour
4.5 cups rhubarb

Beat egg yolks with hand beater. Add sugar. Then add milk and flour. Pour over rhubarb and cook oat medium-high heat on your stovetop until it becomes thick. Lou said this happens pretty fast, and to stir constantly. Be careful because it will burn. Pour hot into the hot crust.

Top with meringue made with the 6 egg whites, 1/2 teaspoon cream of tartar, pinch of salt, and one cup of sugar. Beat these ingredients until stiff peaks form. Put meringue on filling and brown until quite dry in a 350 degree oven.

The torte can be refrigerated overnight, which Lour does if she’s taking it somewhere the next day. You an also use powdered sugar instead of regular sugar in the meringue and Lou says it won’t “weep” as much.

Posted on Leave a comment

Rhubarb Margaritas

Enjoy a South Dakota summer evening with this tart and sweet margarita recipe. Photos by Katie Hunhoff.

I’ve heard from several friends that the rhubarb harvest is amazing this year. If you’re getting tired of rhubarb tarts and pies, margaritas are a fun way to use up your reserves. This recipe is the perfect blend of tart and sweet. We enjoyed them at a friend’s birthday party last week. They take more time to prepare than, say, opening a bottle of beer, but they are worth it. We had a beautiful evening savoring the margaritas, listening to the ice clink in our glasses and feeling a warm summer breeze.

Rhubarb Margaritas

(Recipe by Laura Johnson)

Pick a mess of rhubarb. Cut rhubarb into chunks, throw it in a large pot, pour in enough water to cover, and boil for 10-20 minutes or until rhubarb goes mushy. Let cool. Strain rhubarb juice from rhubarb mush. (Mush is good mixed with sugar and put on top of ice cream or toast — maybe even cake). Measure juice, add an equal amount of sugar or less, depending on your taste, and bring this mixture to a boil. Reduce heat and let simmer for 10 minutes or so.

For the margaritas:
2 cups blanco tequila
2/3 cup Patron citronage, triple sec, or Cointreau
1 1/3-1 2/3 cup rhubarb syrup
2 cups pomegranate-nectarine juice (optional)

Shake with ice and serve over ice.